Homework 4: Shadow Volumes & Shaders & Color
There are three separate parts to this assignment. To earn "full credit" for this assignment you only need to complete one of the parts to earn "full credit" for this assignment. Homework 4 is worth fewer total points than Homework 1, Homework 2, and Homework 3 (because you should be spending most of your time on your final project). If you would like to earn extra credit for your overall homework grade, you can complete two of the three parts, or all three parts of this assignment.
The goal of this assignment is to become familiar with both classic graphics hardware (the stencil buffer), programmable geometry & pixel shaders on a modern GPU, and/or human perception & color spaces.
PART 1: Stencil Buffer, Real-Time Mirror, & Shadow Volumes
NOTE: Using the stencil buffer for mirror and shadow volumes rendering on the Mac M-series ARM chip is incomplete. Students who only have access to an M-series ARM Mac should probably not attempt this portion of the assignment.
-
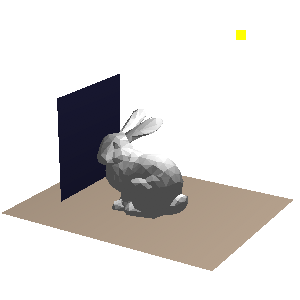
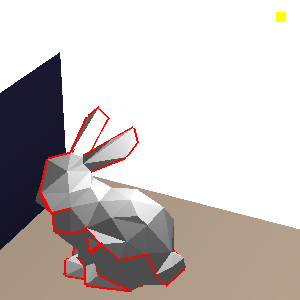
The provided OpenGL code for this assignment will load an .obj into a scene. An appropriately sized quad that represents the floor is placed beneath the object and an appropriately sized quad that represent the mirror is placed to the left of the object. A yellow point above the object represents the position of a point light source. Pressing 'a' will toggle animation of this light, moving it in a circle above the object. Pressing the space bar will move the light one step along this path.
./render --input ../src/bunny_1k.obj
-
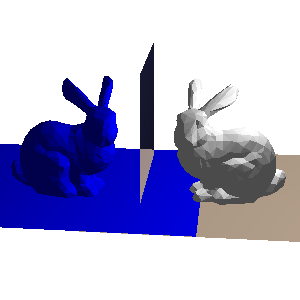
Press 'm' to toggle stencil buffer mirror rendering, which is incomplete. You need to write code to "duplicate" and render the geometry of the mirrored object and floor as they appear to exist, reflected in the mirror. Pressing 'r' will toggle a visualization of the reflected geometries, (NOTE: no longer rendered in bright blue). If everything is working with your stencil buffer, the mirror visualization should then work as shown in the picture below. The objects in the mirror can be tinted slightly blue/green/grey for effect.
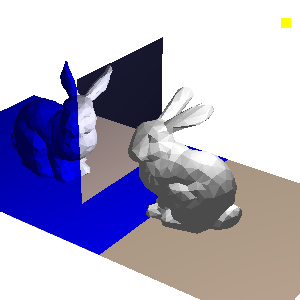
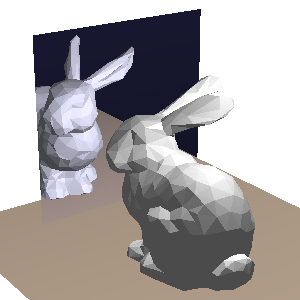
If you study the resulting imagery closely, you'll notice that the lighting is decidedly incorrect. The bunny in the mirror has different local shading than the physical bunny. Which light source(s) should that bunny be lit by? For extra credit, describe the problem in your README.txt file and improve the local shading on the mirrored bunny. (Actually, the lighting on the physical bunny is wrong too and can be improved!)
-
Next, let's implement shadow volumes. The first step is to determine the silhouette edges in the model. These are edges that have one neighboring triangle facing toward the light source, the other triangle facing away from the light source. Pressing 'e' will toggle the visualization of these edges in red, as shown below. You need to write the code to determine which edges are silhouettes and render this geometry.
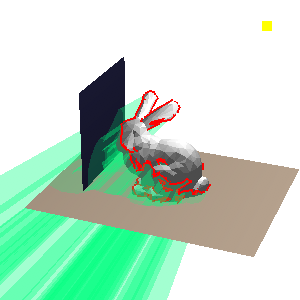
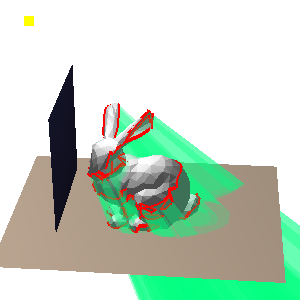
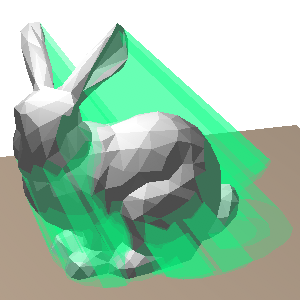
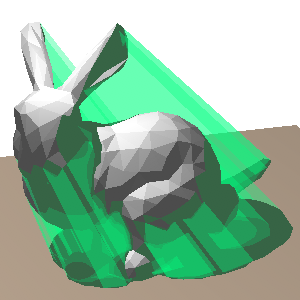
Once these edges are found, we can construct the polygons that form the "sides" of the shadow volumes. These polygons are extrusions of the silhouette edges away from the light source, towards infinity. Pressing 'p' will toggle the visualization of these polygons in green, as shown below, using blending so you can partially see through these polygons and see the depth complexity of the multiple layers of shadow volume polygons. [ NOTE: Currently the blending is broken, so they will be opaque green polygons. ] You need to write the code to construct and render these polygons.
-
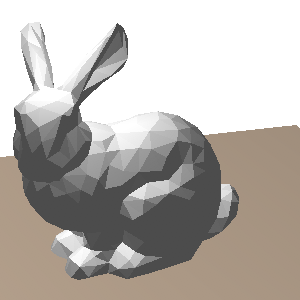
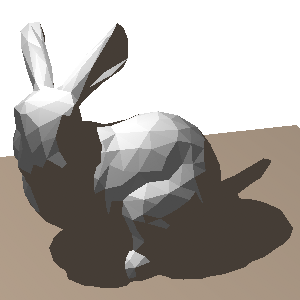
The last step is to do the multi-step rendering to create the shadows. This involves juggling the frame buffer, depth buffer, and stencil buffer. The basic idea is to first render the scene without lighting. Then, we do a special rendering pass of the shadow volume polygons: everywhere the depth buffer passes, we will increment (if the shadow volume polygon faces toward the camera) or decrement (if the shadow volume polygon faces away from the camera) the stencil buffer. Finally, we render the scene a second time with the lights on, but only where the stencil buffer is zero. The shadow rendering mode is toggled by pressing 's'.
An excellent stencil buffer tutorial written by Mark Kilgard at NVIDIA
-
There are several extensions to the basic shadow volumes code that you can do for extra credit, including: handle non-closed objects, improve the efficiency of the method, make the shadow volumes and mirror rendering methods work together (the same shadows should appear in the physical scene and the mirror), or implement "Z-fail" shadow volumes so that the rendering is correct when the camera is inside of a shadow volume (create a new scene to demonstrate this extension). Also, for extra credit you can mirror the light source. Both the real object and the reflected object should be lit by two light sources, the real and the reflected light. Describe any extensions you make in your README.txt file.
PART 2: Programmable Shaders
-
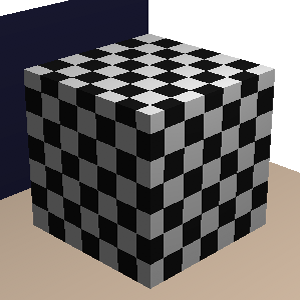
Let's experiment with GLSL shaders (or Metal Shaders if you're on an M-series ARM Mac). Try the examples below, to verify that your system can render with shaders. Once loaded, press the 'x' key to toggle through the different shaders (white, checkerboard, orange, & your new shader).
./render --input ../src/cube.obj
./render --input ../src/sphere.obj
Uncomment the noise line in the fragment shader code to see if your system supports GLSL and the noise function. Note: You can press 'n' to render with per-vertex smoothed normals (Gouraud/Phong shading).
If you get the wrinkled orange shown below... Great! You have support for hardware noise. The surface normals are being randomly perturbed to give the illusion of a bumpy micro-geometry.
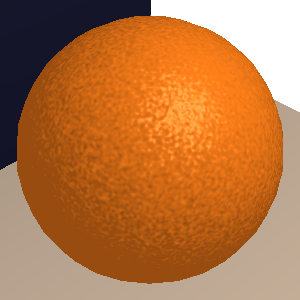
If the checkerboard looks good, but the orange is missing the bump map (if it just looks like a smooth orange sphere), maybe your computer's graphics card doesn't support the noise function. You might want to check that you have the right graphics driver installed -- on Linux you might need to manually install the proprietary driver. Even if you don't have hardware support for noise, you can still do interesting things with shaders for the homework.
If you get it working quickly... great! However, if after a reasonable amount of effort (use Google, etc.) you are unable to get a working setup, then write up what you tried, and what errors you were seeing in your README.txt file.
-
Poke around at the vertex & fragment shaders for these two examples. Make small modifications to the code and see what happens. You don't need to recompile your code if you've only changed the shaders. Just quit & relaunch the program. Note: if you make a syntax error in the GLSL code, the program will most likely crash without giving you an informative error message. Thus, it's recommend to frequently test your code after writing each line or two, so you know exactly where the error was introduced.
-
Once you're comfortable with the provided examples, write your own fragment shaders to simulate wood grain and a repeating brick or "subway" tile pattern. To get inspired look at the world around you (or use Google) to find a sample textures to emulate. You'll submit these inspirational photos along with your assignment. To start the wood grain shader, mimic the rings of tree growth along a primary axis with alternating cylindrical bands of color. Then, you can use a noise function to add geometric variations to the bands to look more natural (so they aren't perfect circles). Experiment with subtle variations in the color as well. Finally, you can add variations in the normal to represent the ridges in the grain visible in the specular highlight of polished wood. In addition to the code, submit screenshots of your shaders. Include references to any online resources you used for this portion of the homework.
NOTE: If you are working with the Metal Shaders on a Mac M1/M2 ARM chip, be sure to include screenshots of each of your finished shaders (since these shaders will not run on the Submitty linux server).
-
Finally, create another complex shader and submit that code and screenshots of the results. In your README.txt file describe your target result (and reference images, if appropriate) and what was necessary to create the result.
PART 3: Perceptual Color Spaces
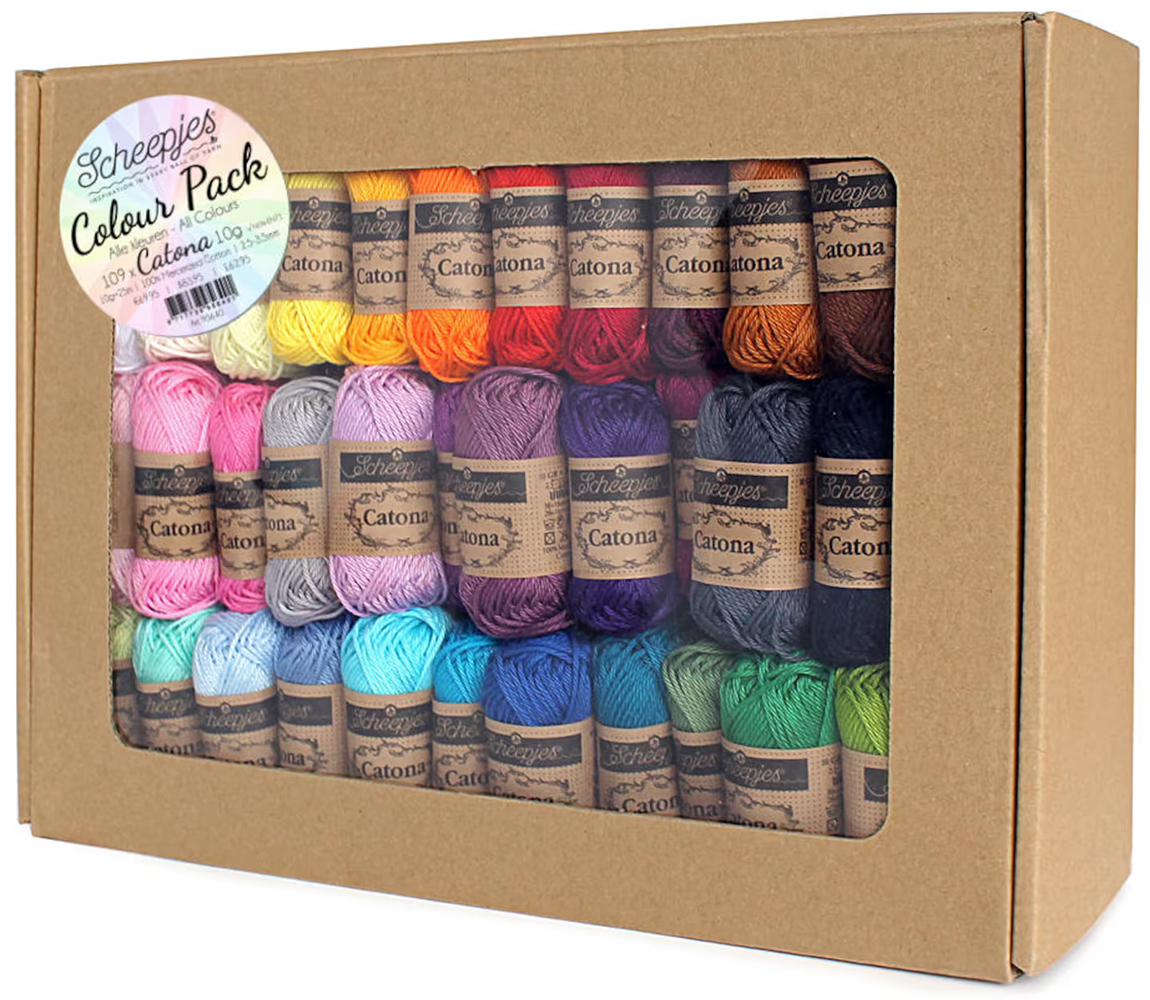
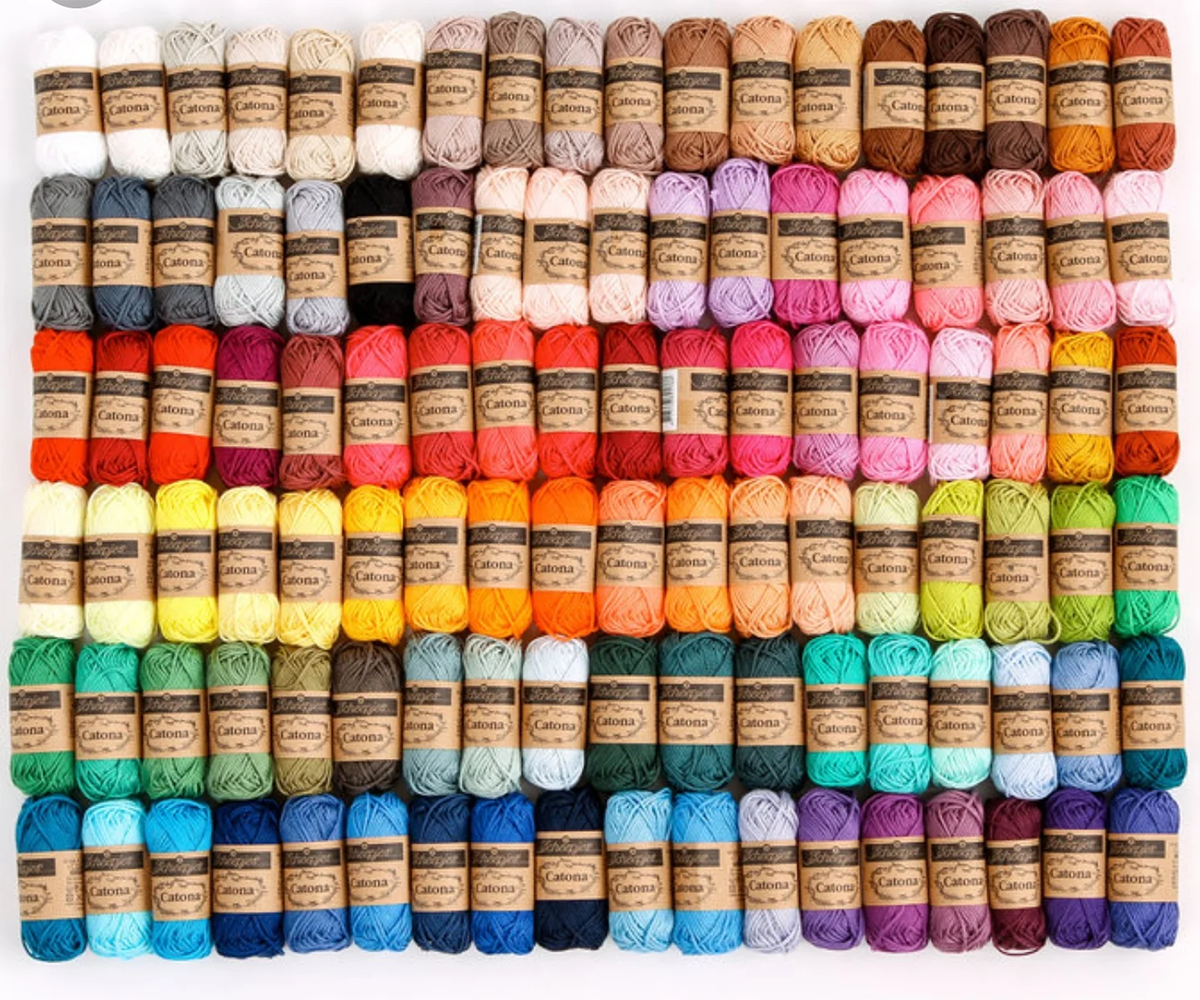
Fiber crafters have many options for fiber type, yarn thickness, and perhaps most importantly, color! The Sheepjes brand sells an amazing variety pack with mini skeins of cotton yarn in 109 different colors. What can a nerdy knitter or crocheter do with this collection?
Let's make a plan for a blanket! The goals:
- Make a large blanket using most/all of the yarn in the box. Specifically we want to use equal or approximately-equal amounts of the different colors. And we want to use nearly every or every color in the box.
- Create a aesthetically pleasing arrangement with the colors. But as a pure artistic goal, this would is too open-ended. So we will more specifically aim to create a smooth and subtly changing color gradient in two-dimensions. Neighboring colors that touch should be as similar as possible to each other.
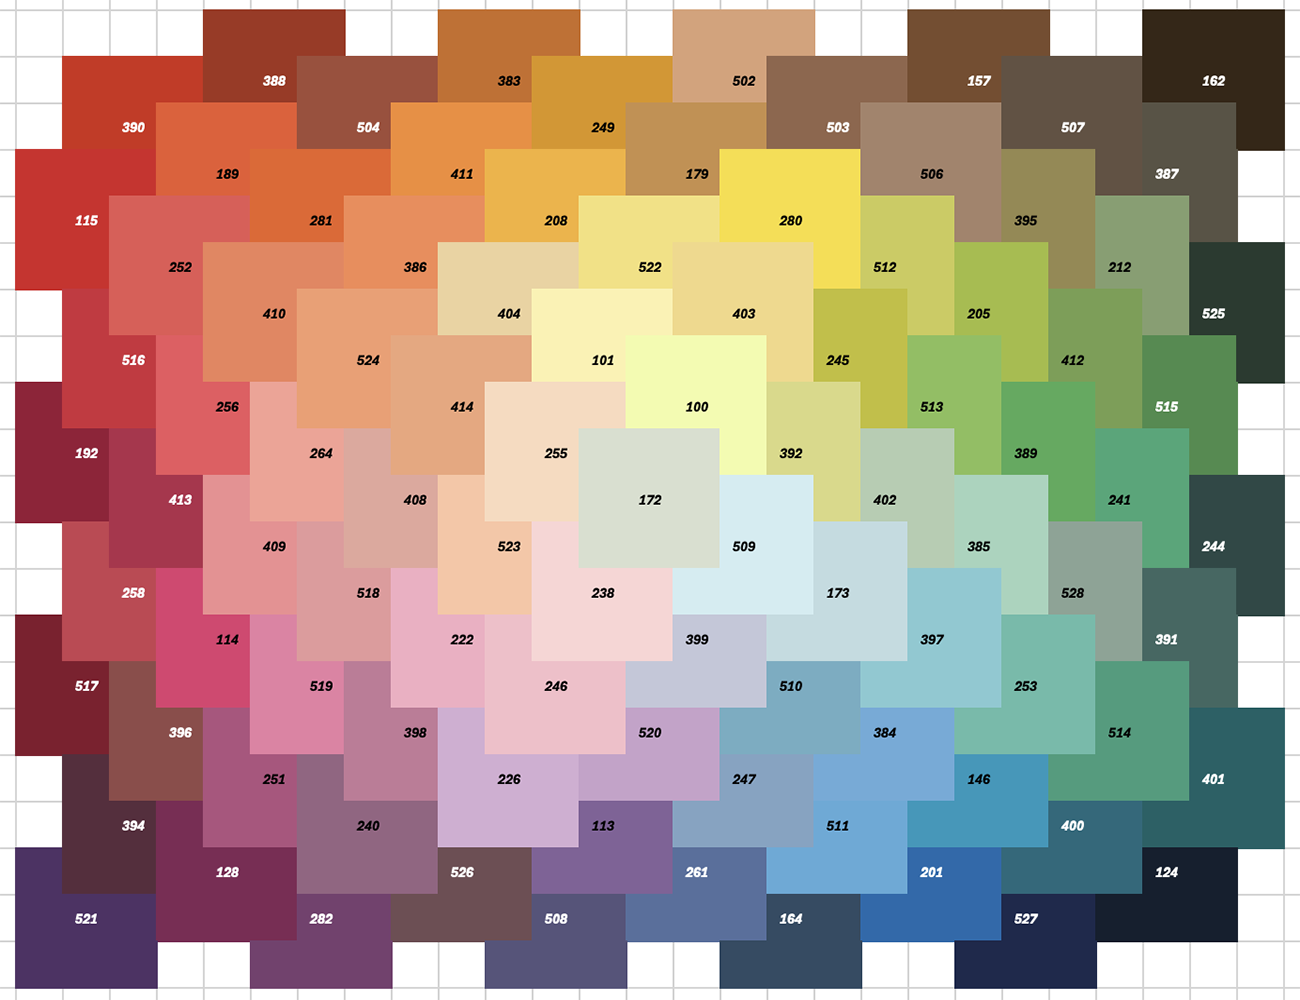
For inspiration, here's a nearly-completed blanket made using 95 colors plus black and white as accent and border colors. So that's a total of 97 of the 107 available colors from the box.
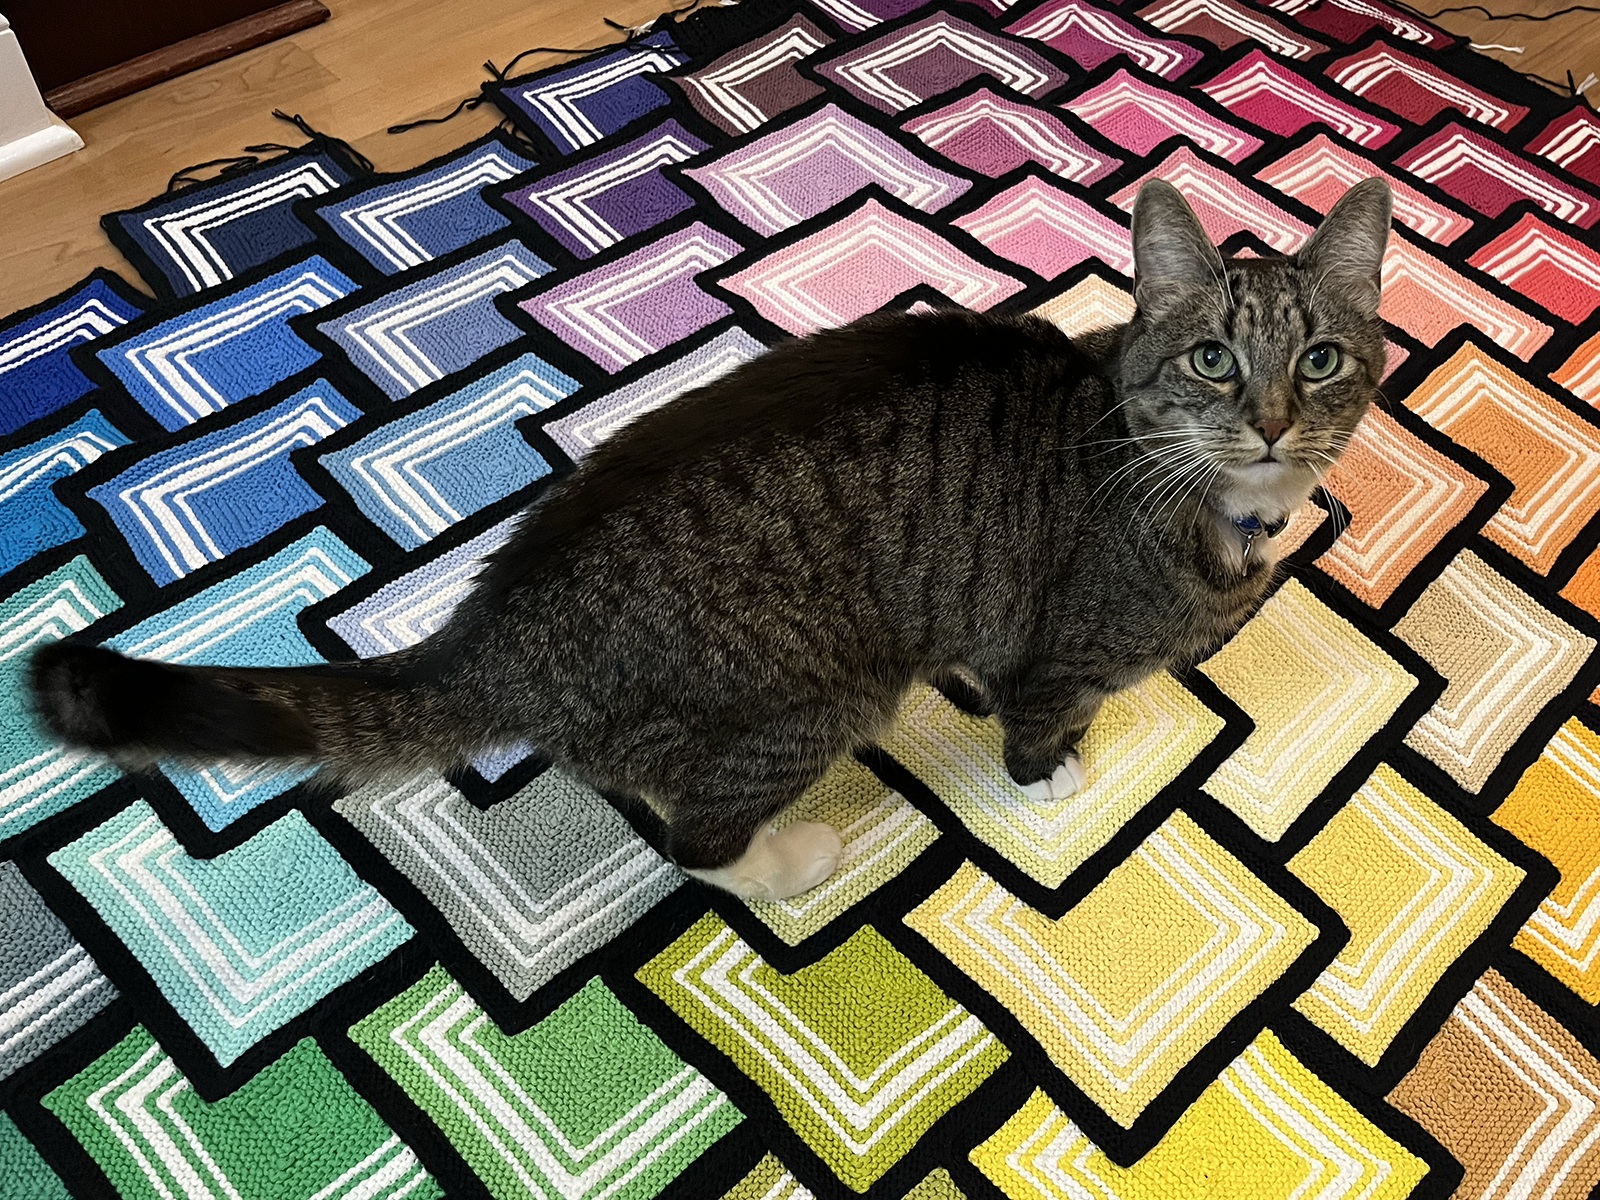
How was this designed? First a geometric design of overlapping/interlocking tiles was created -- based on a diagonal grid. Then a subset of the colors were selected and placed on the grid. This placement was done by hand: lighter colors were placed in center and darker, more saturated colors on the edges. The finished design chart with color codes is shown below.
Is this arrangement optimal? What metric should we use to evaluate or score this design? Can you write a program to create a color arrangement with these yarn colors that has a better score? What is the optimal blanket design?
This part of the assignment is not in OpenGL. The provided code for Part 3 is in the subdirectory 'src/part3_color' and consists of two files: 'color_block.cpp' and 'color.h'. To compile and run the code:
g++ -Wall -Wextra color_block.cpp -o color_block.out
The program will take 4 command line arguments: an input file containing all of the colors, an input file describing the desired output grid dimensions (and optional placement of 'anchor' colors), the output text file which will have the layout of the colors by id, and an output HTML file visualizing the layout using the SVG image format. The output HTML/SVG file can be viewed in any web-browser (e.g., Chrome, Firefox, Safari, Edge).
Here are some sample command lines using the provided files. You are encouraged to modify and write your own test files as well.
  ./color_block.out small_colors.txt small_grid.txt small_ids.txt small.html
  ./color_block.out pastel_colors.txt pastel_grid.txt pastel_ids.txt pastel.html
  ./color_block.out blue_colors.txt blue_grid.txt blue_ids.txt blue.html
  ./color_block.out all_colors.txt medium_grid.txt medium_ids.txt medium.html
  ./color_block.out all_colors.txt large_grid.txt large_ids.txt large.html
Random: 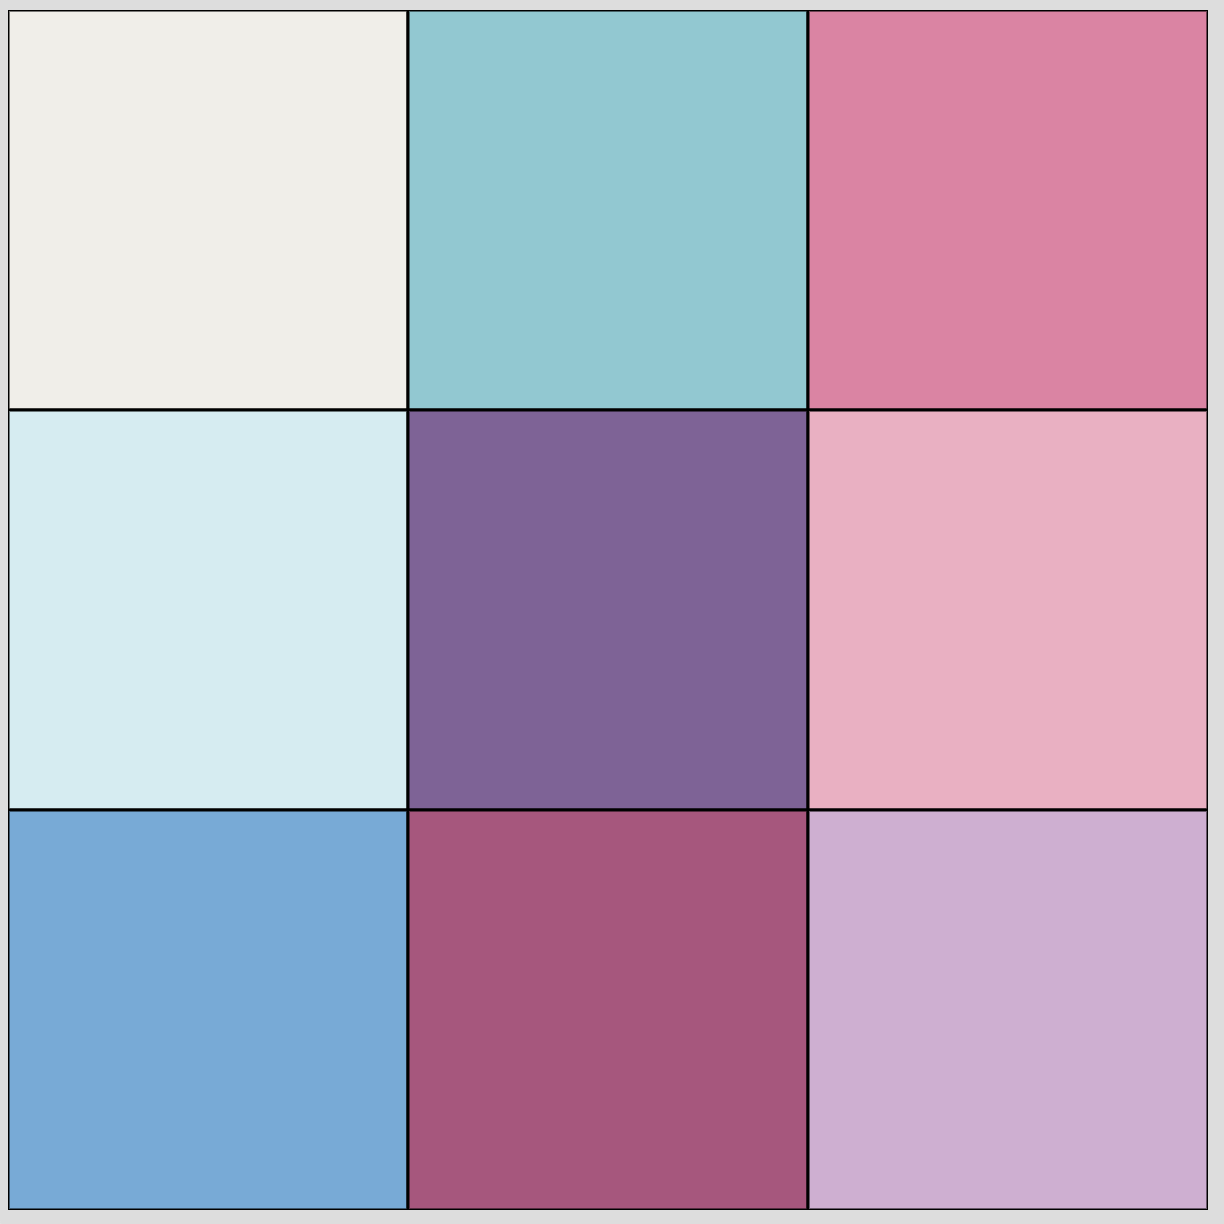 Improved:
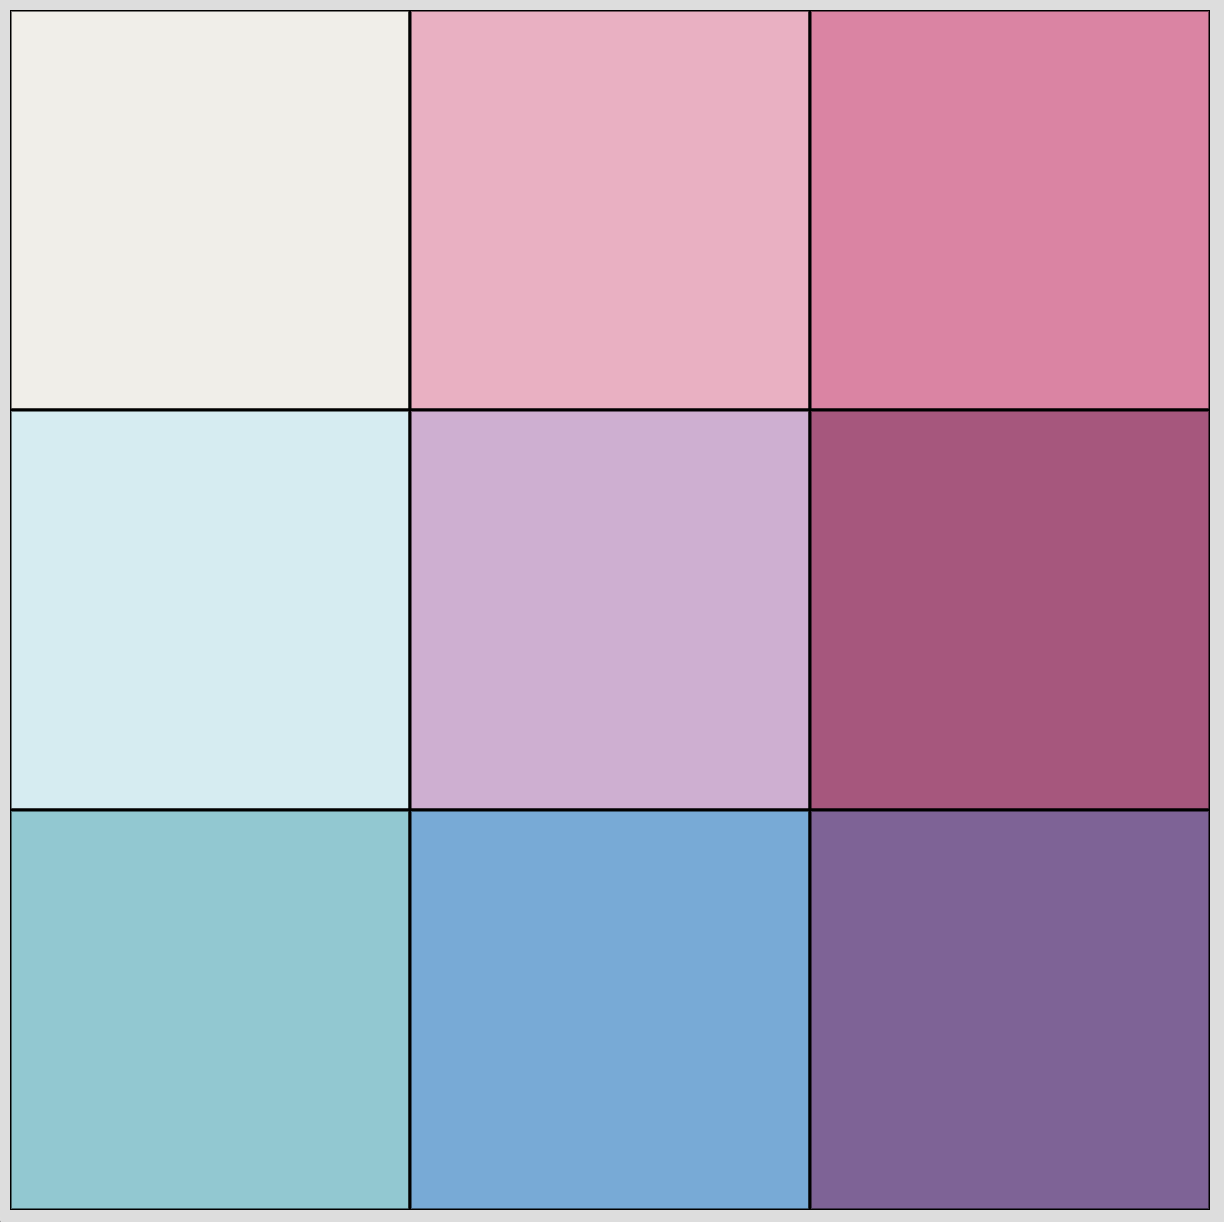
The provided code parses the input files, and transforms the hex color codes into RGB, HSV, XYZ, and LAB color spaces. The "just noticeable difference" formula for comparing LAB colors is included. The provided code places the colors randomly and scores the placement by comparing colors that touch vertically or horizontally. Your task is to develop an algorithm to find a layout that reduces/minimizes the differences between these vertical and horizontally touching colors.
Provided Files for Part 1 and Part 2
-
Basic Code (CMakeLists.txt, FindGLFW.cmake, FindGLM.cmake, argparser.h, boundingbox.cpp, boundingbox.h, camera.cpp, camera.h, glCanvas.cpp, glCanvas.h, main.cpp, utils.cpp, utils.h, and vbo_structs.h)
Similar to the previous assignments. -
Half-Edge Triangle Mesh Data Structure (edge.cpp, edge.h, hash.h, mesh.cpp, mesh.h, triangle.h, and vertex.h)
Similar to the triangle half-edge data structure you used in assignment 1. -
Rendering (render.cpp)
The code for rendering the mesh with stencil buffer tricks. This is where you will do most of your work for the first part of the assignment. -
Shaders (hw4_shader.fs and hw4_shader.vs)
This is where you will do your work for the second part of the assignment. -
Test meshes (bunny_1k.obj, bunny_200.obj, bunny_40k.obj, cube.obj, and sphere.obj)
Files for submission (README.txt and hw4_gradesheet.txt)
Please use the README.txt template for comments about your submission. Also, to streamline grading, please indicate which portions of the assignment are finished & bug free (full credit), attempted (part credit) or not started (no credit) by filling in the provided hw3_gradesheet.txt and submitting it with your assignment. The grader will then check, edit as needed, and finalize your assessment.
Please read the Homework information page again before submitting.